Note: only the account owner or users with administrative permissions are able to update other users' permissions or add/remove users. You can see who the account owner is or who has access to make changes to users by looking for the various icons when in your user section.
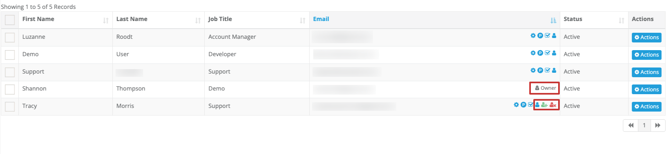
To become an account owner you can ask the current owner to give you ownership by clicking Actions > Make owner
In this article:
Adding multiple users to multiple properties
Resending the user activation email
How to add a new user:
1. Log in to your GuestRevu account at https://my.guestrevuapp.com
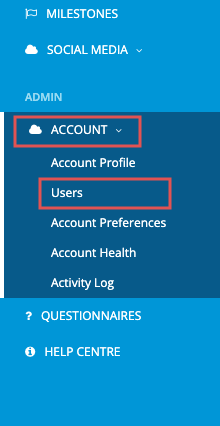
2. Click on Account > Users
3. Click on Invite New User

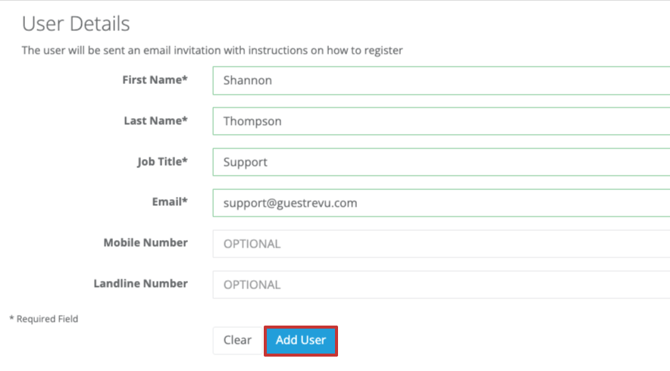
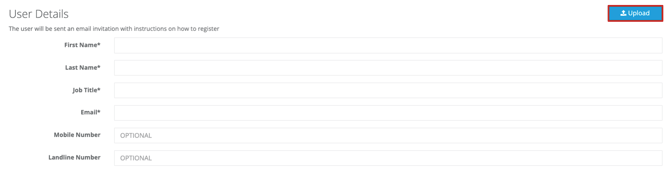
4. Fill in their details and click on Add User.
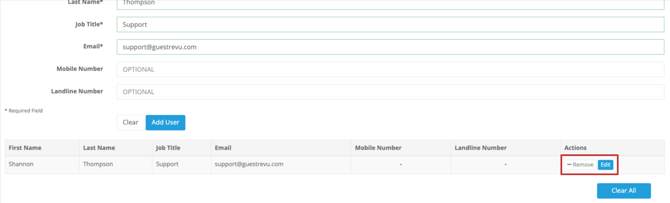
5. Your newly added user will appear in a table just above the user permissions. You can make changes to the user’s details by clicking on edit or remove the user entirely by clicking on remove.
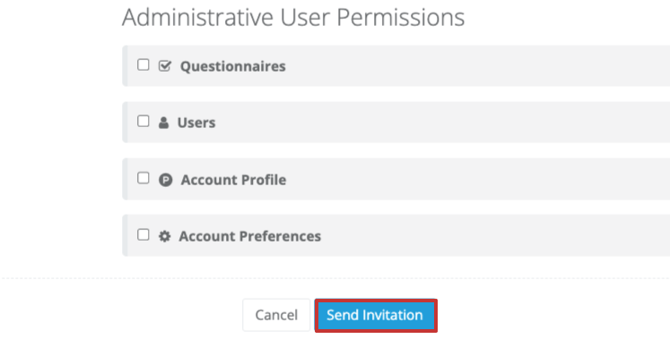
6. Select which features they will be allowed to access (this can be changed at any stage by a user with access to inviting new users under account permissions).
Standard user permissions include everything from Guests > Social Media. Administrative user permissions include additional control over the account such as adding new users, editing questionnaire templates and branding etc.

7. Once you’re happy with your selection, click on Send Invitation.
The new user will receive an activation email to create their password. Please let your new user know that they will be receiving this email to ensure that they don’t miss it. If they don't get it, remind them to check their spam folder.
Adding multiple users to multiple accounts
If you have user(s) who require access to multiple properties:
1. Navigate to your Account List Screen > Users2. Click on Invite New User.
![]()


If you accidentally selected the incorrect account, you can remove it from the selected accounts by clicking Remove Account.

Resending the activation email
The activation email will expire if the user does not activate within 30 days. You can see if the user has been activated by using the filter in the User Screen.
By default, the filter is set to show Active users only. Change your filter to All and check what the Status is for the user you are interested in.

If the user status is Pending, you may need to resend the activation email.
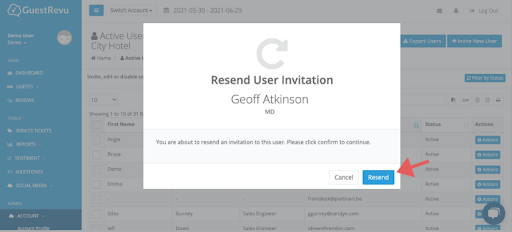
How do I resend the activation email?
- Click the Actions button next to the user
- Select the action Resend

- Confirm that you want to resend
How do I revoke access after I have sent the activation email?
- Click the Actions button next to the user
- Select Retract
-
Confirm Retraction
Find out more about Revoking, restoring or reassigning a user's access
Top Tip 💡
Ensure that all users are getting the right notifications and reports sent straight to their inboxes. Here’s how to export a list of users to audit their settings and see what permissions and notifications they have.